
One Turn Kill Speedrun Route and Any% Strategy
A One Turn Kill speedrun relies on seven loop resets, title-screen dialogue skips, and a Heavy Blow deck transition to reach the credits. Runners clear BIAS 8 in loop five to secure high-damage cards and defeat the final boss quickly.
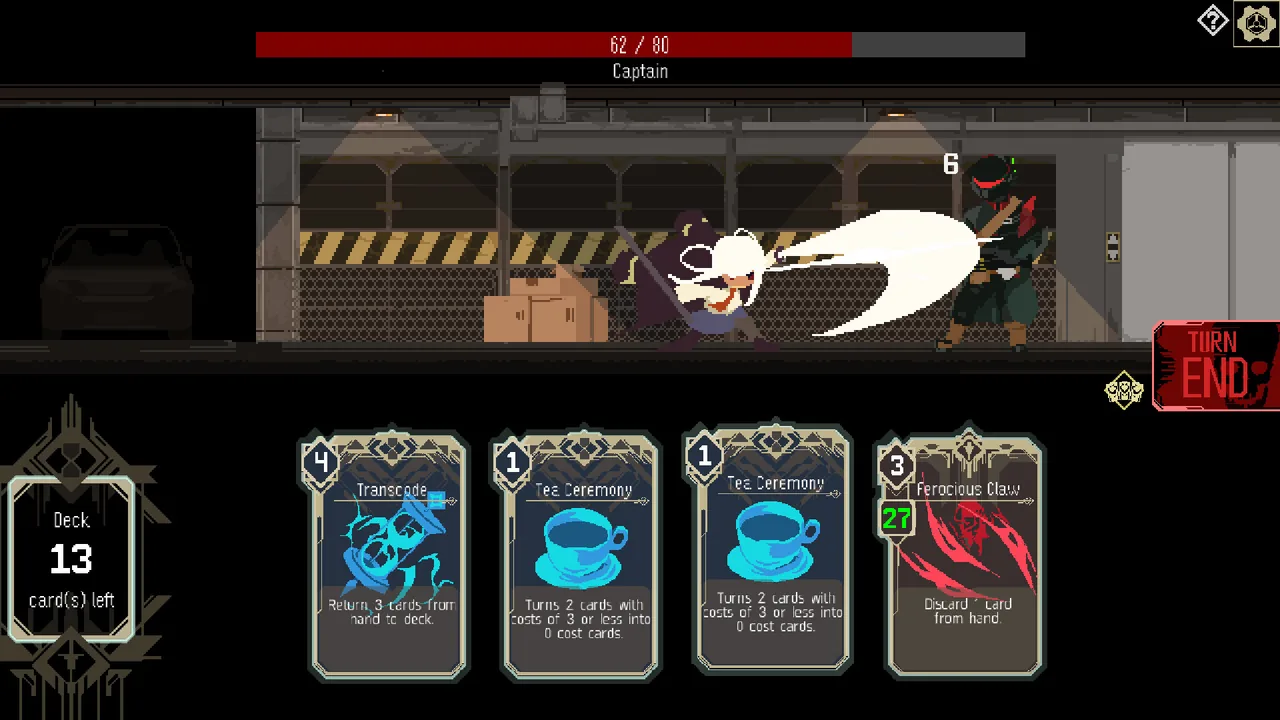
A One Turn Kill speedrun relies on seven loop resets, title-screen dialogue skips, and a Heavy Blow deck transition to reach the credits. Runners clear BIAS 8 in loop five to secure high-damage cards and defeat the final boss quickly.
What Are the Any% Rules for One Turn Kill?
Any% is a speedrun category where the runner reaches the game ending regardless of chosen difficulty settings. The timing starts the moment you select New Game from the title screen. Because the game plays as a PvE card game where card draw serves as the resource cost, running out of deck cards halts your offensive turn and causes immediate defeat.
Drawing cards from the deck costs card uses. — the Steam store page
Official records listed on Speedrun.com track the Any% (Any BIAS) category for PC runs. The current leaderboard ranks TEldango in first place at 10 minutes 52 seconds 540 milliseconds, rock_volnat in second place at 11 minutes 42 seconds 110 milliseconds, and pajazin in third place at 11 minutes 56 seconds. In a Ver.1.0.3 run by the video runner, Any% concluded in 13 minutes 31 seconds. The core mechanical time save throughout the run comes from returning to the title screen during narrative cutscenes between the mercenary protagonist Saskia and her sister Rita, which bypasses lengthy dialogue scripts entirely.
How Do Runners Route the Seven Loops?
Loop routing is a structured progression that cycles through seven runs to unlock late-game damage cards. Every loop requires specific combat encounters, deck adjustments, and boss selections to trigger story milestones without wasting real time.
- Loop 1: Complete the opening tutorial fights against Captain, Azwen, and Bulk using basic strike sequences. Select the Bomb skill upon clearing the first battle. Exit to the title screen when dialogue begins to reload at home base.
- Loop 2: Face Captain at 122 HP, Azwen, D-Rex, and Bulk at 220 HP. Collect Overheat and Double skills. Overheat places Kafka cards into your draw pile, supplying card cost when the deck empties. Bulk seals targeted cards, requiring you to play or cycle sealed resources before they lock up completely.
- Loop 3: Unlock the pre-deployment menu that allows level configuration. Skip all combat encounters directly at the launch terminal to speak with Rita at base. Full combat skipping only works on this loop; doing so in subsequent loops causes Rita to halt progression.
- Loop 4: Claim Moroha no Yaiba and Nelker's Experiment from difficulty clear rewards. Adjust cards into an Oxalis Assassin configuration. Deploy against a Level 1 Captain only, then immediately choose surrender during the mock battle against Rita.
- Loop 5: Select Level 2 for all targets across the board to set the total difficulty to BIAS 8. Defeating all four targets under BIAS 8 unlocks the card enhancement facility alongside Heavy Blow and upgrade chips.
- Loop 6: Select BIAS 9 while skipping Azwen to avoid deck pollution. Upgrade Heavy Blow immediately. Clear the remaining three encounters, take down Level 3 Bulk to unlock Ieji, and surrender the second mock duel against Rita.
- Loop 7: Construct the final deck featuring Heavy Blow and Ieji. Set enemy levels to Captain 4, Azwen 2, D-Rex 4, and Bulk 3. Defeat the final boss encounter to trigger the ending credits and stop the timer.
How Does the Heavy Blow Strategy Work?
Heavy Blow is an offensive card that scales its attack power based on the total cost of all cards currently held in your hand. An early patch rebalanced the card, but it remains the primary damage engine for speedruns. When its total attack power reaches 50 or higher, Heavy Blow gains an additional strike count per activation, delivering multiple hits in a single card play.
To exploit Heavy Blow without paying its heavy casting fee, runners pair it with cost-reduction cards like Chakubuku to drop its cost to zero. In loop seven, using Ieji allows you to play Heavy Blow and recycle it straight back into the draw pile. This recycling loop generates sufficient burst damage to take down Level 4 Captain at 450 HP and complete the multi-phase final boss fight before enemy interrupts bounce your hand.
Which Deck Setup Fits Each Speedrun Phase?
Deck transitions are distinct deck builds deployed at specific loops to balance draw velocity against escalating enemy health pools. The official listing on the Steam store page specifies a strict 20-card deck limit, requiring runners to trim cards between runs to maintain combo consistency.
| Deck Archetype | Optimal Phase | Resource Cost and Risk |
|---|---|---|
| Starter Strike Deck | Loops 1–3 | Relies on base attack cards; risks running out of deck draws against Bulk |
| Oxalis Assassin Deck | Loops 4–5 | Uses Assassin's Sign at sub-5 deck size; vulnerable to Azwen adding Kafka cards |
| Ieji Heavy Blow Deck | Loops 6–7 | Requires card upgrades and cost reducers; fails if Heavy Blow is buried at the deck bottom |
During loops four and five, the Oxalis Assassin setup relies on thinning your draw pile until five or fewer cards remain, triggering Assassin's Sign for 50 base damage per hit. Once BIAS 8 rewards unlock Heavy Blow, you discard the Assassin shell entirely in favor of high-cost hand assets and multiple copies of Heavy Blow.
How Do Boss Encounters Affect Card Order?
Boss mechanics are unique encounter gimmicks that force specific card sequences during each single-turn kill. Because every encounter must conclude in one turn, mismanaging enemy disruption terminates the run.
Azwen adds unusable Kafka cards to your deck every time you play three cards, diluting your draw pile and disabling the thin-deck condition of Assassin's Sign. To counter this disruption, runners burn quick draw cards before playing heavy finishers and skip Azwen entirely during loop six.
D-Rex operates on a real-time movement mechanic rather than turn actions. If D-Rex reaches your character position, Saskia suffers instant death. Dealing damage pauses D-Rex momentarily, demanding immediate offensive plays. At Level 4 in loop seven, D-Rex adds a passive penalty that increases the play cost of all cards in your hand by one upon encounter start and repair phases. Runners counter this penalty by using Overheat to supply emergency deck resources, reducing bosses to zero health before the penalty stalls card execution.
Next step
Steam Deck Settings
Check Steam Deck Playable verification details, trackpad controls, and system compatibility settings for One Turn Kill.
Related Guides
One Turn Kill Steam Deck Performance and Controls; One Turn Kill Backdoor Card Guide & Combos; One Turn Kill Guide: Core Rules and Deck Builds
Steam Deck Settings
Check Steam Deck Playable verification details, trackpad controls, and system compatibility settings for One Turn Kill.
Backdoor Guide
Understand how the Backdoor card replicates active encounter skills and enables high-damage combo rotations.
Game Guide
Understand card draw resource mechanics, deck cycling tactics, and boss patterns to clear encounters in One Turn Kill.